How to use a manual button tensile machine

Usually includes the following steps. The specific operation may vary slightly depending on the equipment model. Please refer to the equipment manual:

Preparation

1. Check the equipment

① Confirm that all parts of the tensile machine (clamp, handle, dial, etc.) are intact.

② Ensure that the clamp is clean and free of oil or residue to avoid affecting the test results.


2. Calibrate the equipment (first use or regular calibration)

Adjust the pointer to zero according to the manual, or use a standard weight to verify the accuracy of the reading.


3. Prepare the sample

(1) Sew the button to be tested on the standard fabric (or keep the button on the original garment), ensuring that the seam is firm.

(2) Cut the fabric and leave enough area around the button (usually ≥5cm×5cm) for clamping.


Test steps

1. Fix the sample

Upper clamp: clamp the fabric (avoid the seam) and ensure that the fabric is flat and does not slide.

Lower clamp: Clamp the button (if it is a four-hole button, it needs to be fixed with a special clamp or hook).

Note: The direction of the clamp must be consistent with the force direction of the button (such as vertical or horizontal stretching).


2. Start the test

(1) Slowly turn the handle or pull the lever to apply tension at a constant speed (usually the speed recommended is 10-15cm/min).

(2) Observe the connection between the button and the fabric until the button falls off or the stitching breaks.


3. Record data

(1) Read the maximum tension value indicated by the pointer (usually in Newtons N or pounds-force lbf).

(2) Record the damage form when the button falls off (such as stitching breakage, button fragmentation, etc.).


Post-test operation

1. Reset the equipment

(1) Loosen the clamp, remove the sample, and return the handle of the tensile machine to its original position.

(2) Clean the thread or fabric fragments remaining in the clamp.


2. Data analysis

Compare the test results with industry standards (such as ASTM D4846, ISO 13935, etc.) to determine whether the button is qualified.


Precautions

Safe operation: Avoid rapid force or overload testing to prevent the fixture from breaking and injuring people.

Environmental conditions: It is recommended to test in a standard temperature and humidity environment (such as 23±2℃, 50±5%RH).

Multiple tests: It is recommended to test the same button 3-5 times and take the average value to improve accuracy.

Common problem handling

The pointer does not return to zero: Check whether the spring or lever is stuck, and contact the manufacturer for calibration if necessary.

Button slips: Replace the fixture or use an anti-slip pad to enhance the clamping force.

If more detailed guidance is required, please provide the equipment model or refer to the specific manual.


Email: hello@utstesters.com

Direct: + 86 152 6060 5085

Tel: +86-596-7686689

Web: www.utstesters.com


Manual rubbing color fastness tester use

I. Instrument overview

The manual rubbing color fastness tester is used to evaluate the color transfer degree of textiles, leather, coated fabrics and other materials under dry or wet rubbing conditions. The equipment is easy to operate and is suitable for rapid color fastness testing in laboratories or factories. It complies with relevant standards (such as GB/T 3920, ISO 105-X12, AATCC 8, etc.).


II. Test principle

By manually operating the friction device, the standard friction cloth is rubbed back and forth on the surface of the sample with the specified pressure and number of frictions, and the color staining of the friction cloth is observed and compared with the standard grayscale sample card for rating.


III. Operation steps


1. Preparation

Sample preparation:

Cut the sample to be tested with a size of ≥20cm×5cm (adjusted according to the standard), ensuring that the surface is flat, wrinkle-free and stain-free.

Rubbing cloth cutting: Use standard bleached cotton cloth (as specified in GB/T 7568) and cut it into a 5cm×5cm square.

Wet friction test: The friction cloth needs to be soaked with distilled water, and the moisture content is controlled at 100±5% (the moisture can be controlled by wringing).


2. Install the friction cloth

Wrap the friction cloth flatly on the friction head (usually a round friction head with a diameter of 16mm) and fix it with a rubber band or a fixing clip to ensure that there is no looseness or wrinkles.


3. Fix the sample

Spread the sample to be tested flat on the test bench or flat table and fix it with a clamp to prevent movement.


4. Manual friction test

Dry friction test:

1. Press the friction head wrapped with the friction cloth vertically on the surface of the sample.

2. Apply standard pressure (usually 9N or as required by the standard).

3. Rub back and forth 10 times at a uniform speed in the straight direction (one way is about 10cm, speed is about 1 time/second).

Wet friction test:

1. After the friction cloth is soaked, gently squeeze out excess water (avoid dripping).

2. Perform the test according to the dry friction steps. After the friction is completed, remove the friction cloth and dry it immediately.


5. Result evaluation

After the friction cloth is dry (wet friction needs to be dried naturally), compare it with the standard staining gray scale sample card (such as ISO 105-A03) and evaluate the staining level (level 5 is the best and level 1 is the worst).

Record the test results of dry friction and wet friction, and use the lower level as the final evaluation.


Email: hello@utstesters.com

Direct: + 86 152 6060 5085

Tel: +86-596-7686689

Web: www.utstesters.com


Notice on the holiday arrangement for May Day in 2025

Dear customers:

Hello!

On the occasion of May Day, thank you for your trust and support for our company. According to the national statutory holidays and the actual situation of our company, the holiday time and service arrangements are hereby notified as follows:


Our holiday time:

May 1, 2025 (Thursday) to May 5 (Monday), a total of 5 days.

April 27 (Sunday) and May 10 (Saturday) will be normal work.


Service arrangements:

1. During the holiday, our company will suspend logistics delivery (if you need urgent assistance, please contact the duty phone: 0596-7686689).


Thank you again for your understanding and support! I wish you a happy holiday and a healthy family!


UTS International Co., Ltd.

April 25, 2025

Single yarn strength usage instructions

1. Product Overview

Single yarn strength refers to the maximum force that a single yarn can withstand when it is stretched and broken, and is one of the important indicators for measuring yarn quality. This product is suitable for testing and evaluating yarn strength in the textile industry.


2. Scope of application

1. Strength test of various types of yarns such as cotton yarn, wool yarn, and chemical fiber yarn

2. Quality control of textile production enterprises

3. Acceptance standards for yarn procurement

4. Material performance research of scientific research institutions


3. Technical parameters

1. Test range: 0-5000cN

2. Accuracy: ±1%

3. Clamping distance: 100mm, 250mm, 500mm (adjustable)

4. Stretching speed: 50-500mm/min (adjustable)

5. Test environment: temperature 20±2℃, relative humidity 65±3%


4. Operation steps


4.1 Preparation

1. Place the instrument on a stable workbench

2. Connect the power supply and preheat for 15 minutes

3. Set the appropriate clamping distance and stretching speed according to the yarn type

4. Prepare the yarn sample to be tested to ensure that it is not damaged and has no knots


4.2 Test process

1. Clamp the yarn sample vertically in the upper and lower clamps

2. Ensure that the yarn is not loose and is perpendicular to the fixture

3. Start the test program

4. The instrument automatically records the breaking strength value

5. Repeat the test at least 20 times to obtain reliable data


4.3 Data processing

1. Calculate the average single yarn strength

2. Calculate the strength unevenness

3. Record the maximum and minimum values

4. Generate a test report


5. Notes

1. The instrument should be calibrated before testing

2. Different types of yarn should use corresponding test parameters

3. Avoid the fixture from clamping the yarn and affecting the test results

4. The temperature and humidity of the test environment should meet the standard requirements

5. Clean the fixture surface regularly to maintain the test accuracy


6. Maintenance

1. Perform a full calibration once a month.

2. Clean the instrument surface after each use.

3. Check the sensor sensitivity regularly.

4. When not in use for a long time, the power should be turned off and covered to prevent dust.

Email: hello@utstesters.com

Direct: + 86 152 6060 5085

Tel: +86-596-7686689

Web: www.utstesters.com

How to Customize Mold Manufacturing?

Custom mold manufacturing is a complex process involving multiple stages such as requirements communication, design drafting, material procurement, precision machining, assembly adjustment, and delivery acceptance. Below is the detailed process:

1. Requirement Communication

Conduct in-depth discussions with clients to clarify the mold's application scenarios, performance requirements, and budget constraints.

2. Design Drafting

Use CAD/CAM software to create precise mold base designs and technical drawings tailored to client specifications.

3. Material Procurement

Select high-quality steel or alloy materials to ensure the strength and stability of the mold base.

4. Precision Machining

Employ high-accuracy processes like CNC machining and EDM (Electrical Discharge Machining) for fine processing of mold components.

5. Assembly & Testing

Assemble the mold and conduct multiple trial runs to verify precision and operational stability.

6. Delivery & Acceptance

Deliver the mold upon client approval and provide ongoing maintenance support.


Key Technologies in Custom Mold Manufacturing

Critical technologies include high-precision machining capabilities, customized services, and technical innovation. For instance, Xiamen Craft Co., Ltd. utilizes advanced equipment and expertise to deliver tailored solutions. Manufacturers typically offer end-to-end services—from design consultation to production oversight and post-sales support—ensuring precise alignment with client needs.


Custom molds are widely used in automotive, electronics, home appliances, medical, and packaging industries. A notable example involves Begmeier Manufacturer, which developed a high-precision, high-strength mold base for a leading medical device company. This solution resolved deformation issues during bumper injection molding, significantly improving product yield and earning client acclaim.


With the rise of smart manufacturing, mold manufacturers are adopting intelligent transformation strategies. By integrating intelligent robots and automated production lines, they enhance efficiency while reducing labor costs. Sustainability is also prioritized through eco-friendly materials, optimized processes, and improved resource utilization to minimize waste and environmental impact.

To thrive in a competitive market, manufacturers must maintain sharp market insights, foster innovation, strengthen collaborations across supply chains, and build synergistic industry ecosystems to address evolving challenges.


How to Maintain and Service Youngpool Technology Splicing Machine

1. Daily Maintenance of Splicing machine:

- Check the battery level before daily use.

- Power on and click the reset button to ensure all motion axes reset properly.

- Verify the vacuum level is normal.

- Clean the equipment surface and material tape channel with a clean cloth after use.

- Regularly remove dust and debris from the cutting blade, sensors, splicing platform, and camera light source.

Splicing machine supplier

2. Lubrication Maintenance:

- Monthly, lubricate moving parts (e.g., guide rails, cylinders, cam components) with the specified lubricant.

- Ensure the air circuit is clear and air pressure remains stable.

3. Regular Calibration:

- Quarterly, calibrate sensors and cutting blades to maintain splicing accuracy.

- Contact Youngpool Technology's Splicing Machine after-sales service immediately if misalignment or cutting inaccuracies occur.

4. Replacement of Wear Parts:

- Regularly inspect and replace worn consumables like adhesive tape and cutting blades.

- Use original factory parts to ensure optimal equipment performance.

What is Youngpool Technology SMT Intelligent Splicing Machine

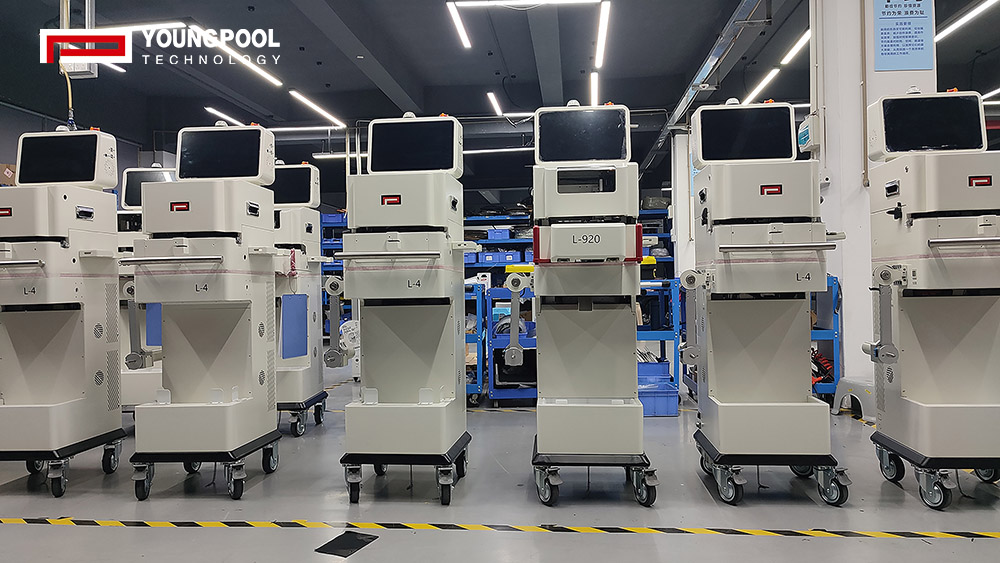
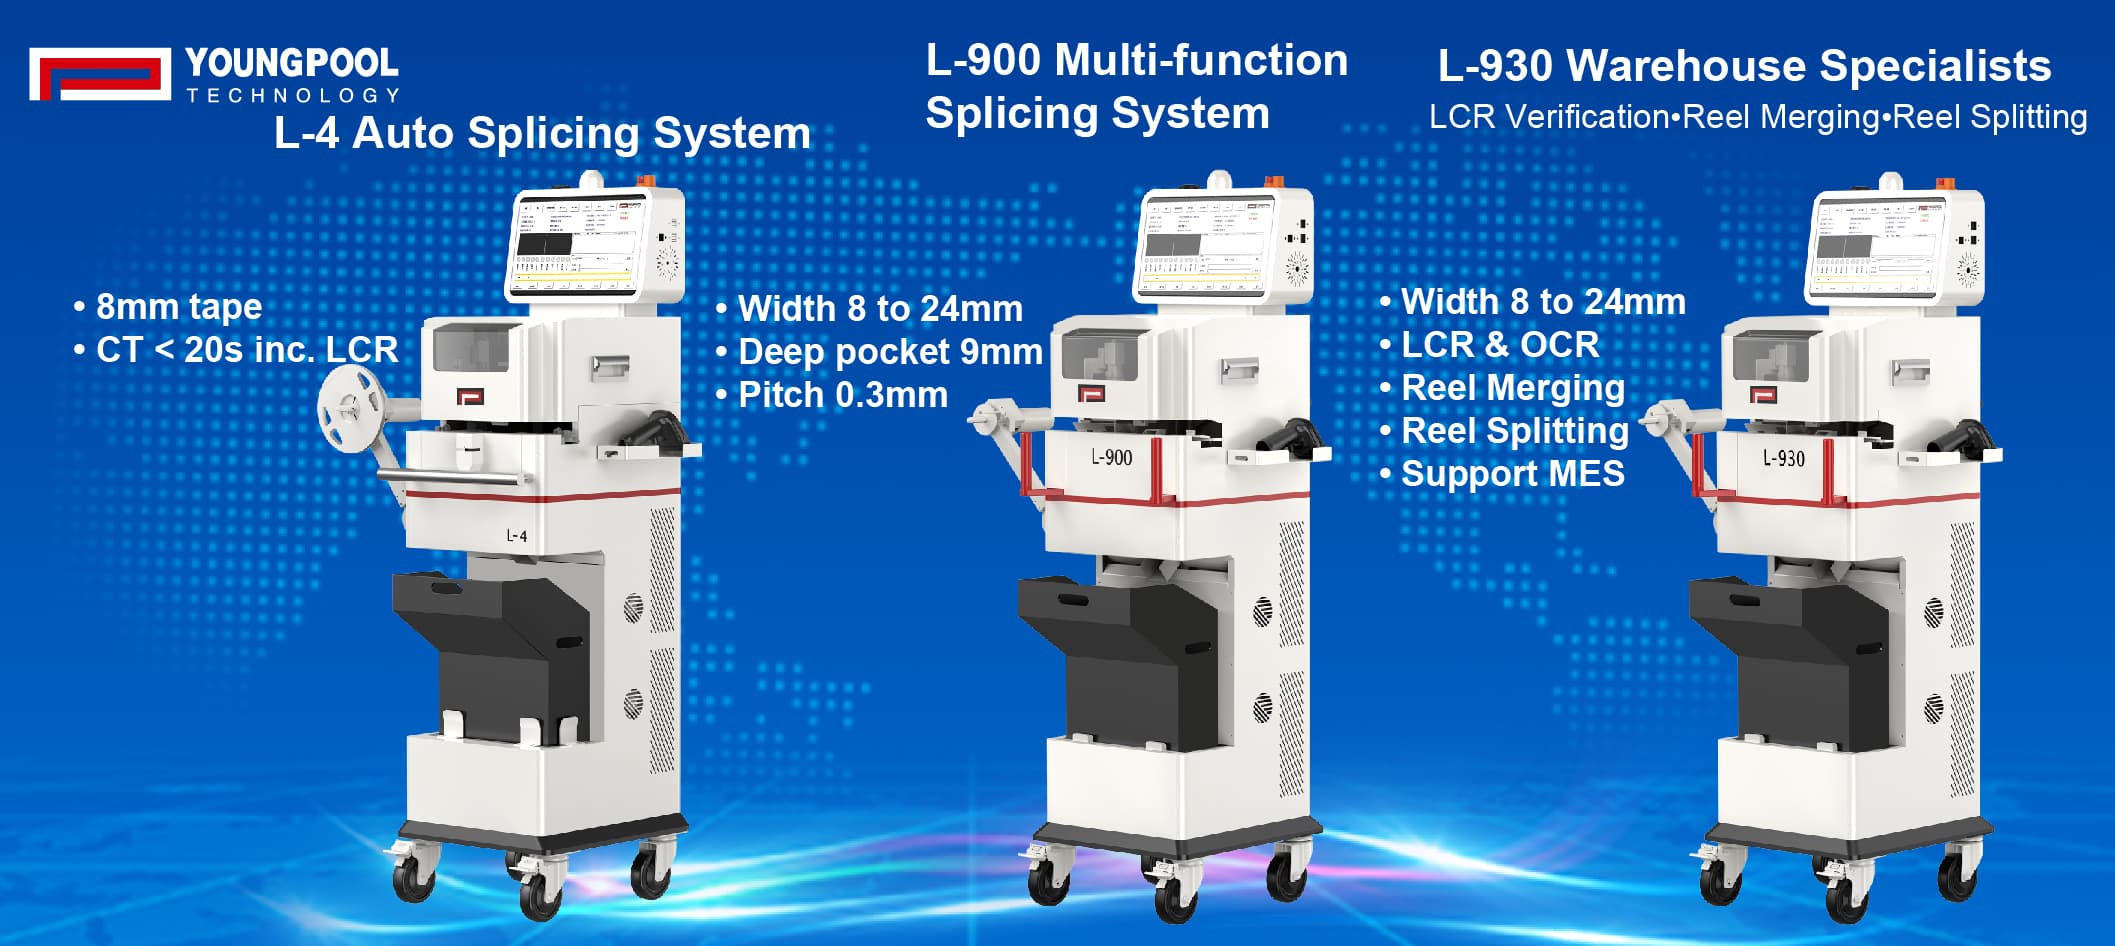
In the modern electronics manufacturing industry, the efficiency and stability of SMT (Surface Mount Technology) production lines are the keys to an enterprise's competitiveness. To further enhance the level of production automation and reduce manual intervention, Youngpool Technology has launched an SMT intelligent  splicing machine. This device is specifically designed for the front - end of SMT production lines, aiming to achieve automated material replacement and tape splicing, ensuring continuous operation of the production line and avoiding downtime due to material replacement.

Functional Features

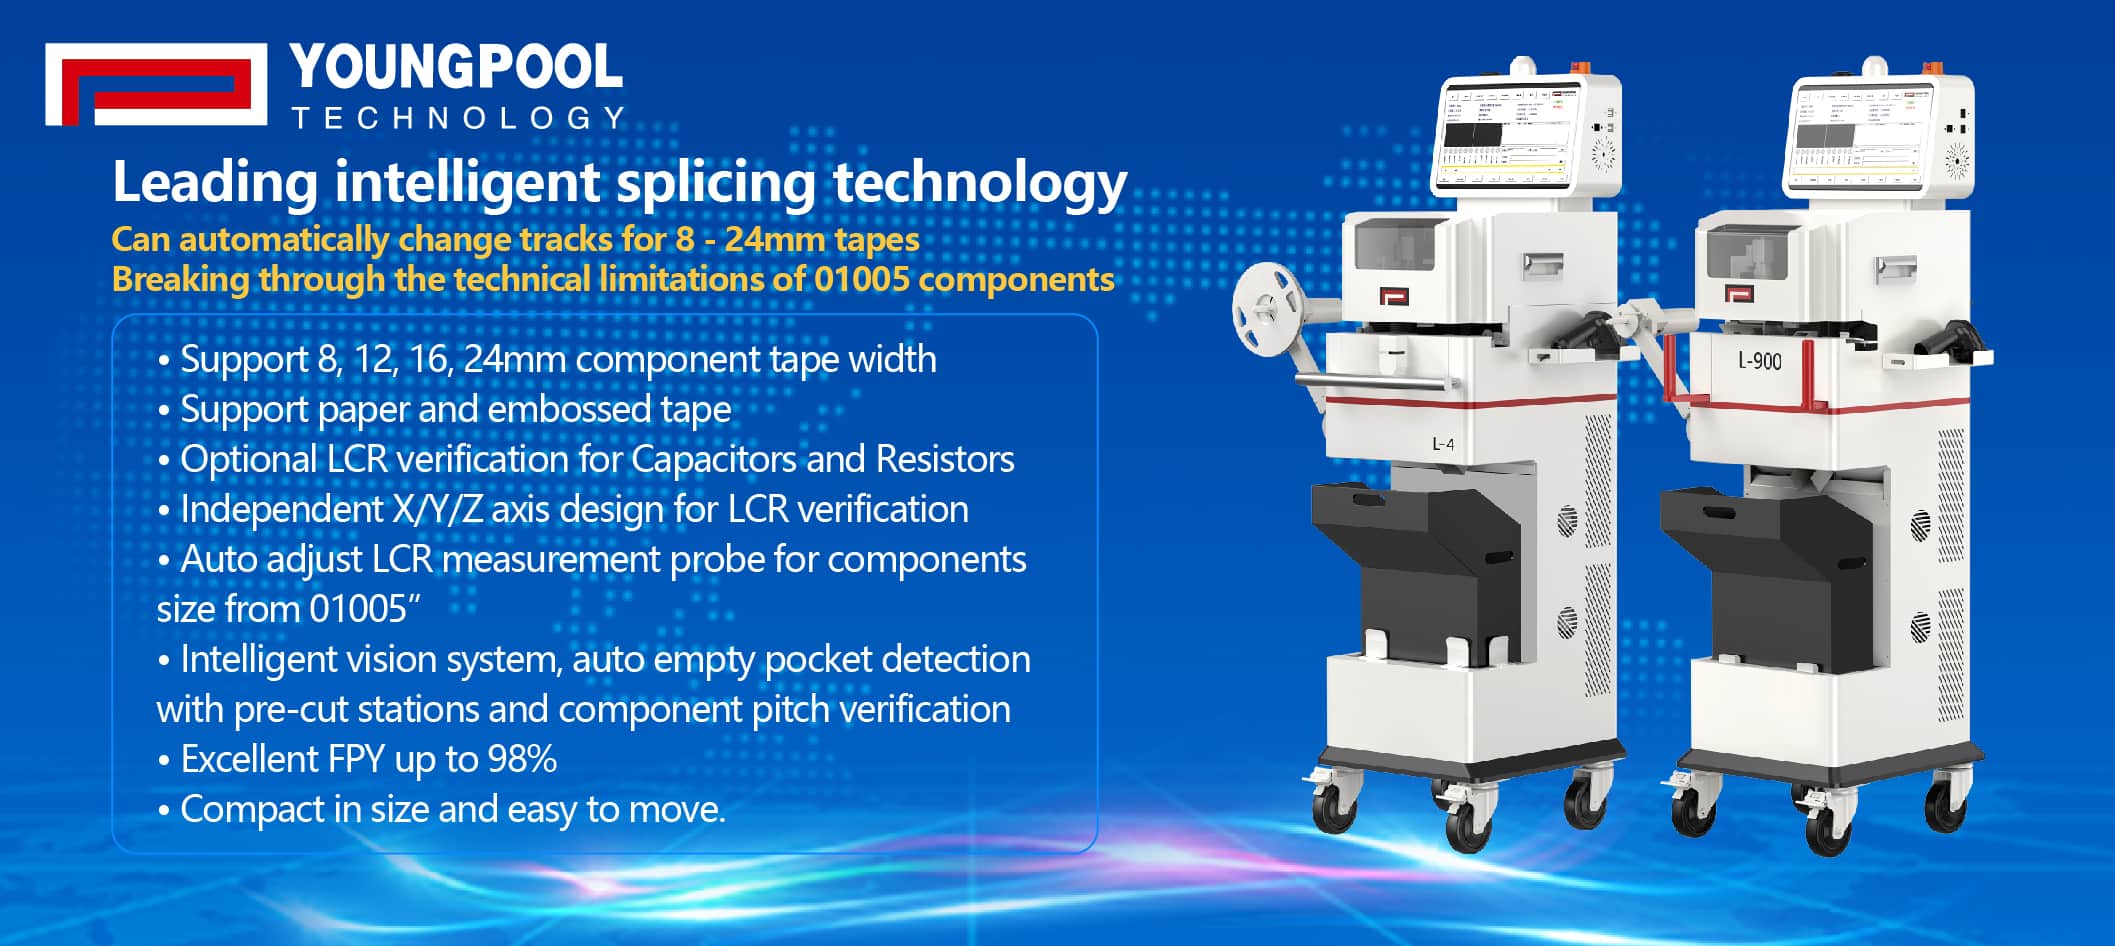
1. Automatic empty - tape detection function: The splicing machine can monitor the empty - tape situation of the tape in real - time, preventing empty tapes at the splicing port, which could affect the normal operation of the chip shooter machine, and ensuring an uninterrupted production process.

2. Support for automatic adjustment of splicing for 8/12/16/24mm tapes: It can adapt to tapes of different widths. With a single - button track change, it achieves precise docking, improving the flexibility and efficiency of material replacement.

3. Precise alignment and seamless connection: Through a high - precision camera vision positioning system, it ensures perfect docking of the old and new tapes, reducing poor splicing caused by manual cutting errors, thus avoiding splicing quality problems and material waste.

4. High passing rate: The passing rate of Youngpool Technology's  splicing machine reaches over 98%, significantly reducing labor costs and losses caused by splicing errors.

5. LCR measurement anti - error design: It adopts an advanced LCR measurement comparison anti - error mechanism to prevent operational errors and ensure the safety and reliability of the production process.

6. Compact and small in size: The compact design takes up little space and is easy to integrate into existing SMT production lines without affecting the overall layout of the production line.

7. Movable design: The device is equipped with wheels at the bottom, facilitating flexible movement between different production lines and improving the utilization rate of the device.

8. Compatibility with various chip shooter machines: It is compatible with mainstream pick - and - place machine brands and models in the market (such as Panasonic, FUJI, YAMAHA, ASM, etc.), ensuring seamless integration.

Application Value

1. Cost reduction: It reduces the labor cost required for manual splicing and also decreases material waste and quality problems caused by manual operation errors.

2. Efficiency improvement: Fast automatic splicing shortens the material replacement time, improves production efficiency, and extends the continuous operation time of the production line.

3. Quality enhancement: Precise tape splicing alignment reduces material damage and position deviation, improving the product yield.

4. Easy operation: The simple and easy - to - learn operation interface allows new employees to get started after a short training, reducing training costs.

5. Multi - functionality: It is not only suitable for SMT production lines but also applicable to scenarios such as warehouse material management, offering multiple uses in one machine and high cost - effectiveness.

Youngpool Technology's SMT intelligent splicing machine is an important tool for promoting the transformation of the electronics manufacturing industry towards higher automation and intelligence. Through its advanced automatic tape splicing technology and high reliability, it helps enterprises optimize the production process and enhance overall competitiveness. In a production environment that pursues high efficiency, stability, and low cost, the SMT intelligent splicing machine is undoubtedly a worthy investment.

What is an automatic UV sterilizer and its application?

An automatic UV sterilizer is a machine that utilizes ultraviolet light to kill bacteria. It has such as high efficiency, safety, and environmental friendliness. It is suitable sterilization treatment of various bottled and canned food, beverages, medicines, and other products. It can eliminate microorganisms such as bacteria, viruses, and parasites to ensure the quality and safety of the products.

The scientific principle behind UV disinfection mainly targets the DNA of microorganisms, disrupting their DNA and rendering them unable to reproduce and replicate, thus achieving the purpose of sterilization and disinfection.


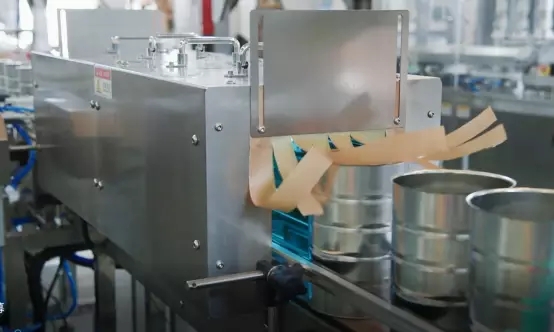
The machine typically consists of a conveyor belt, UV sterilization lamps, and a control system. During operation, bottled or canned products enter the sterilization chamber via the conveyor belt, and the UV sterilization lamps irradiate the surfaces of the products, killing the microorganisms present. The entire sterilization process is conducted in a closed environment, ensuring the hygiene and quality of the products.


The automatic UV sterilizer has the following advantages:


  • Efficient sterilization: Ultraviolet light possesses high energy and penetration, capable of killing various microorganisms, including bacteria, viruses, and parasites.


  • Safety and environmental friendliness: UV sterilization does not produce chemical residues and is harmless to the environment and human health. However, when used in non-sealed conditions, it can still be harmful to the human body. Please pay attention to safety and use with caution.


  • Easy operation: The machine is equipped with an intelligent control system that enables automated operation and monitoring, thereby improving production efficiency.


  • Strong adaptability: The UV sterilization machine is suitable for products of different shapes and sizes. The position and quantity of the sterilization lamps can be flexibly adjusted.


In practical applications, the equipment can be used for sterilizing surfaces and air, and it is widely applied in multiple fields such as powdered milk processing plants, food factories, cosmetics factories, dairy farms, breweries, beverage factories, and bakeries.


As people's demands for food health and quality continue to rise, the application of automatic UV sterilization machines will become increasingly widespread. Utrust pack has been committed to research and innovation in the field of food can packaging, adhering to the concept of "beyond needs, we aspire for deeds" and continuously making higher-quality can packaging solutions for customers.